Practical guide · Local AI
How to install open AI models on your PC
Download a model, get your first reply, and use it on your own computer.
Installing a local AI model takes three steps: install a runner, download compatible model weights, and send a small test prompt. Once that works, you can connect it to a chat application, editor, or coding agent. You can use the model on its own; connecting it to Lyre is an optional final step.
This guide covers three approaches: Ollama for a short command-line workflow, LM Studio for a graphical workflow, and llama.cpp for direct control over a model file and local server. You only need one to begin.
The screenshots show successful Ollama and llama.cpp setups on an Apple silicon Mac. The Windows and Linux steps follow the linked official documentation. LM Studio's written steps follow its documentation; its app could not launch on our recording Mac, so we have not verified that route hands-on.
“Open models” here means downloadable model weights you can run locally. It does not mean every model is open source or has the same license. Check the model card for the exact model you choose.
Jump to: Choose a runner · Ollama · LM Studio · llama.cpp · Troubleshooting · Add it in Lyre
Understand what you are installing
There are three separate pieces:
- The runner is software such as Ollama, LM Studio, or llama.cpp. It loads models and performs inference.
- The model weights are the downloaded files containing the model’s learned parameters. Installing a runner does not automatically mean your chosen model is installed.
- The application provides your workflow: a chat window, document assistant, editor, or coding agent. Some runners include a chat interface; other applications connect to the runner through a local API.
Downloading and loading are also different. A downloaded model occupies disk space. A loaded model also consumes working memory while it is available for inference. LM Studio’s getting-started guide describes this distinction and its download → load → chat sequence.
Choose a runner and a model that fit
| Approach | A useful starting point when… | How models are selected |
|---|---|---|
| Ollama | You want a few commands and an easy local API | Model names and tags, such as qwen3:4b-instruct |
| LM Studio | You prefer browsing, downloading, and chatting in a desktop interface | Discover search and a model picker |
| llama.cpp | You want explicit control over GGUF files and server options | A local file path or a Hugging Face repository |
Start smaller than the largest model you think your computer can run. Keep enough memory for your operating system and other applications. The download size is not the total memory requirement: context, caches, and runtime overhead also matter. Our recording machine had 16 GB of unified memory; that is context for the demonstration, not a promise that every 16 GB computer will behave the same way.
Check these details before downloading:
- Compatibility. Match the runner, model architecture, file format, and your hardware. A GGUF file is a common llama.cpp input; a different format is not automatically interchangeable.
- Purpose. For conversation, choose an instruction/chat model. A base model or reasoning-oriented variant may behave differently. Coding agents additionally need reliable tool use and enough context.
-
Quantization. Labels such as
Q4_0,Q4_K_M, orQ8_0identify different representations of the weights. Smaller representations usually save memory at some quality cost; the labels are not model quality scores. - Publisher and license. Read the model card and license for the exact repository or tag. Public download access alone does not establish unrestricted use.
LM Studio’s download documentation explains its search and quantization choices. Its current system requirements recommend 16 GB or more of RAM and specify supported platforms; on macOS, they currently require Apple silicon and macOS 14 or newer. Check the requirements again when installing a newer release.
Option 1: Install and use Ollama
1. Install the runner
Visit the official Ollama download page and choose your operating system.
-
Windows: run
OllamaSetup.exe, finish the installer, and open a new PowerShell window. Ollama runs in the background; the installer makes theollamacommand available. See Ollama for Windows. - macOS: open the disk image, copy Ollama into Applications, and launch it. You can drag it or use Command+C and Command+V. Complete any system approval for its command-line shortcut, then open Terminal.
-
Linux: follow the
official Linux installer. Its documented
quick install is
curl -fsSL https://ollama.com/install.sh | sh. Review the script before running it. After setup, check the service; if you are running it manually, keepollama serveopen in a separate terminal.
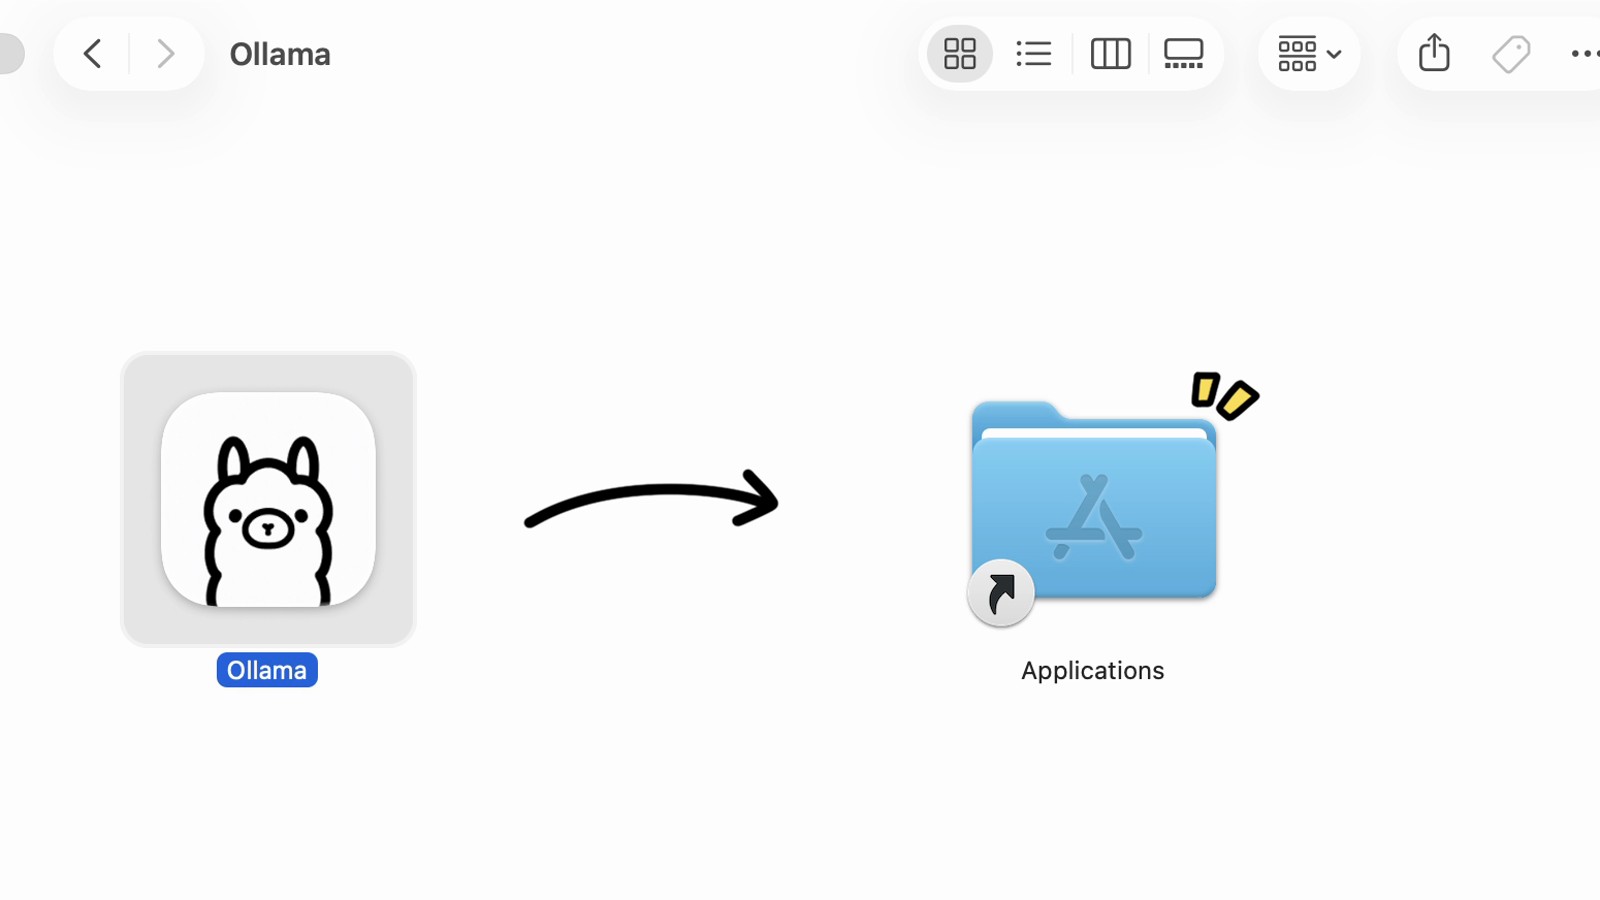
In the recorded version, onboarding offered
“No thanks, I’ll use Ollama locally.” We chose that option. Screens can
change between releases. Check the command is available with
ollama --version before downloading weights.
2. Download one model
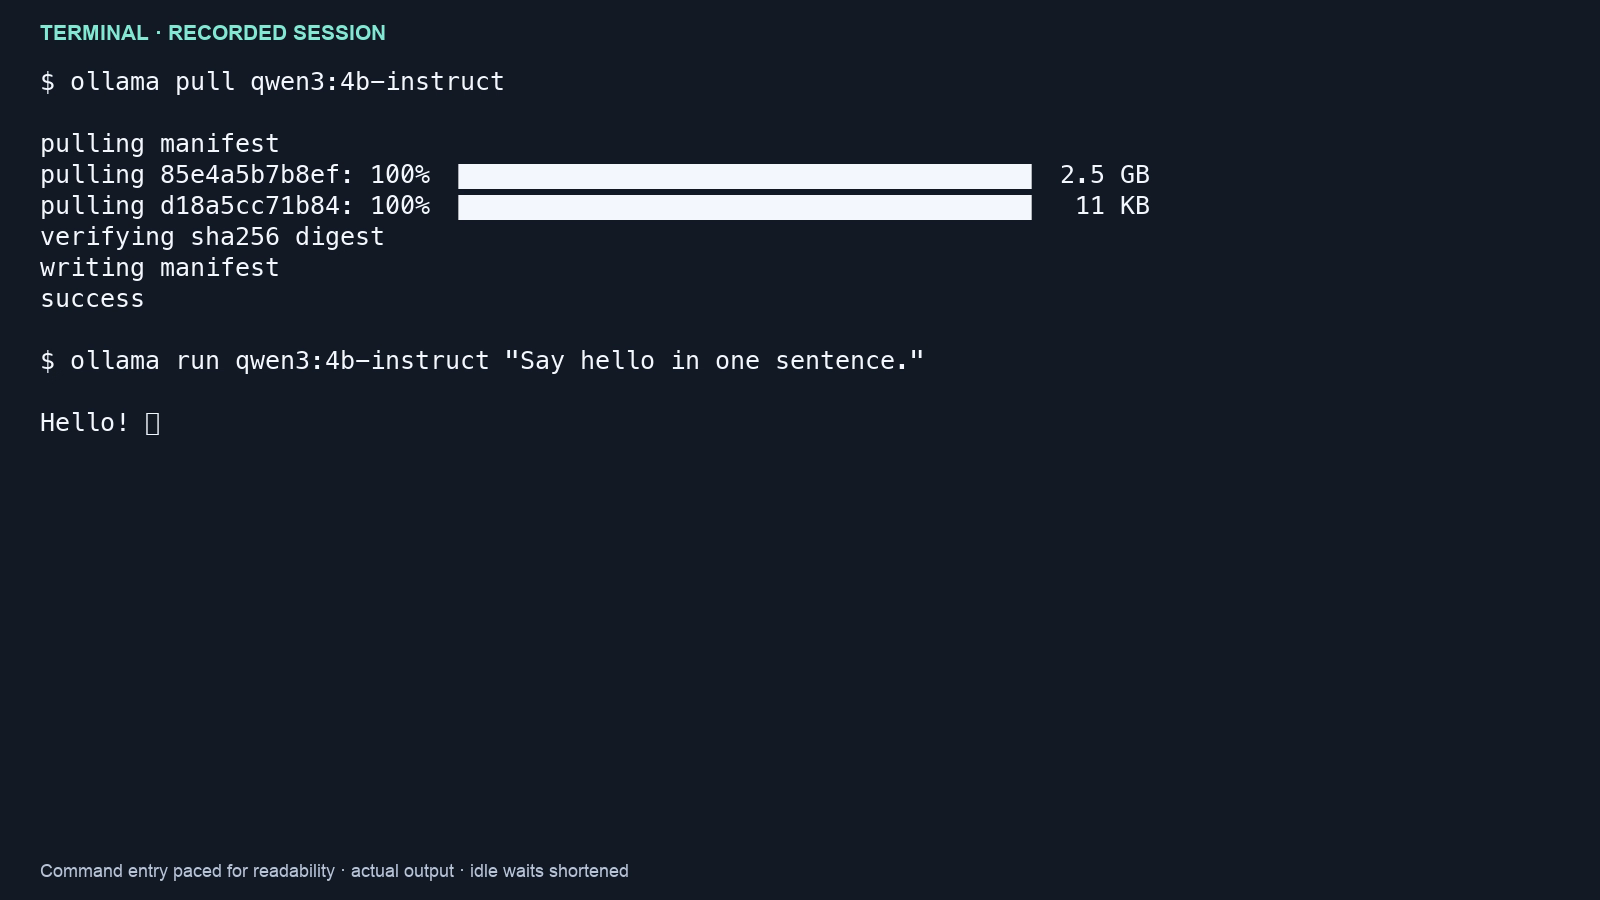
Open Terminal on macOS/Linux or PowerShell on Windows, then run:
ollama pull qwen3:4b-instruct
Wait until the download and verification finish. In our recording, this tag downloaded
about 2.5 GB. Use the full tag: the plain qwen3:4b tag and the
qwen3:4b-instruct tag were different variants when we tested them. The
Qwen3 tag listing identifies the
available variants and their sizes.
3. Ask a small question
ollama run qwen3:4b-instruct "Say hello in one sentence."
You should see a generated response. This verifies more than seeing a model in a
download list. For an interactive conversation, run
ollama run qwen3:4b-instruct without the prompt. Enter /bye to
leave the session.
Useful commands:
ollama list                        # Models saved on disk
ollama ps                          # Models currently loaded
ollama stop qwen3:4b-instruct       # Unload this model from memory
Ollama’s quickstart covers the basic command workflow. Once the runner works, applications can use its local service; keep the Ollama application or service running.
Option 2: Install and use LM Studio
This is a graphical alternative to Ollama; you do not need both.
1. Install LM Studio
Download LM Studio from its official download page. The page also lists other products, including Bionic and the headless daemon; choose the desktop application for this walkthrough. Select the correct operating system and processor architecture. On Windows, run the installer; on macOS, copy the app into Applications and open it. Linux uses an AppImage: make the downloaded file executable in your file manager’s Properties/Permissions panel, then launch it. Check the platform requirements first.
2. Download a compatible model
Open Discover. Search by model name, repository name, or Hugging Face URL. Review the publisher, format, file size, and license. Choose a small supported model and a quantization that fits your machine, then start the download. On macOS, the documented shortcut for Discover is Command+2; Windows/Linux use Ctrl+2. See Download an LLM.
3. Load it and send a message
Go to Chat, open the model loader, and choose the downloaded model. Wait for loading to finish. Send a short prompt such as “Give me three ideas for organizing a reading list.” Confirm that you receive a response before changing advanced settings. These steps follow LM Studio’s basic workflow.
4. Start its server only if another app needs it
For integration with another application, open Developer and turn on
Start server. Note the displayed address and model identifier. LM
Studio also documents lms server start for its CLI. See
LM Studio as a local API server.
For clients using the OpenAI-compatible API, the usual base URL is
http://localhost:1234/v1 when the server is configured on port 1234. Use
the actual port shown by your installation. Compatibility describes the request format;
it does not mean requests are being sent to OpenAI. See
LM Studio’s compatibility documentation.
Option 3: Run a model with llama.cpp
1. Install a build for your computer
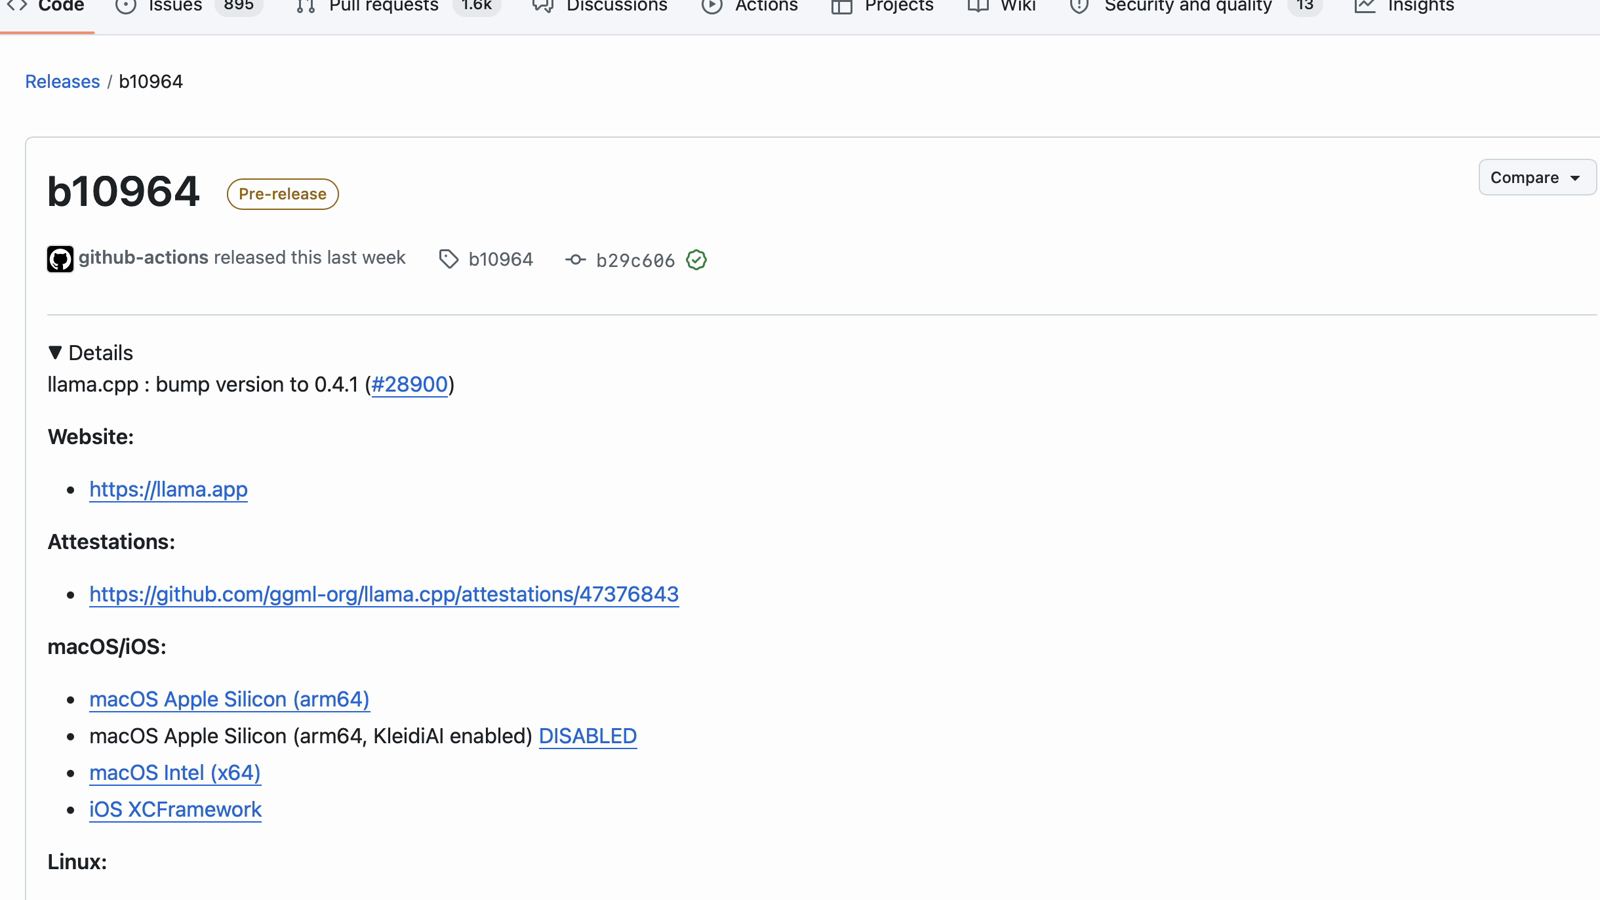
Visit the official llama.cpp releases. Choose the archive matching your operating system, processor, and intended compute backend. Extract it and keep the binaries and accompanying libraries together.
Our demonstration used the official Apple silicon archive from build b10964. This is a pinned example, not an instruction to always install that older build.
Alternatively, the project’s
installation guide
documents winget install llama.cpp on Windows and
brew install llama.cpp with Homebrew on macOS/Linux. With a package-manager
install, use llama-cli and llama-server from your PATH without
the ./ prefix.
Open a terminal in the extracted directory and check:
./llama-cli --version
On Windows, use the corresponding .exe command, such as
.\llama-cli.exe --version. Distribution layouts and commands may change;
the project README also describes
the newer llama command and installation options.
2. Download and serve a small model
The following is a single macOS/Linux shell command, split across lines with backslashes:
./llama-server \
  -hf ggml-org/Qwen3.5-0.8B-GGUF:Q4_0 \
  --host 127.0.0.1 --port 8085 \
  -c 4096 --alias local-demo --reasoning off \
  --cors-origins http://127.0.0.1:8085
For Windows PowerShell, use this one-line version in the extracted
folder (if the executables are in bin, open the terminal there):
.\llama-server.exe -hf ggml-org/Qwen3.5-0.8B-GGUF:Q4_0 --host 127.0.0.1 --port 8085 -c 4096 --alias local-demo --reasoning off --cors-origins http://127.0.0.1:8085
The -hf option fetches the selected model if needed. Here,
Q4_0 chooses a quantization; -c 4096 limits context for this
small test; local-demo gives the server a convenient model identifier. The
explicit host binds it to the current computer. Port 8085 was chosen to avoid another
service already using a common default port. The CORS option restricts browser origins
in this build; it is not a substitute for authentication if you later expose a server to
other devices.
This example comes from the
ggml-org Qwen3.5 0.8B GGUF repository, which lists the Q4_0 weights at about 563 MB. It is a small setup demonstration, not
a recommendation for demanding coding work. We verified the command against the
installed build’s --help and obtained actual local responses.
If you already have a compatible GGUF file, you can use
-m /path/to/model.gguf in place of the Hugging Face argument. Use your real
file path and preserve any additional files the model requires. Check the
server documentation
for your release’s supported options.
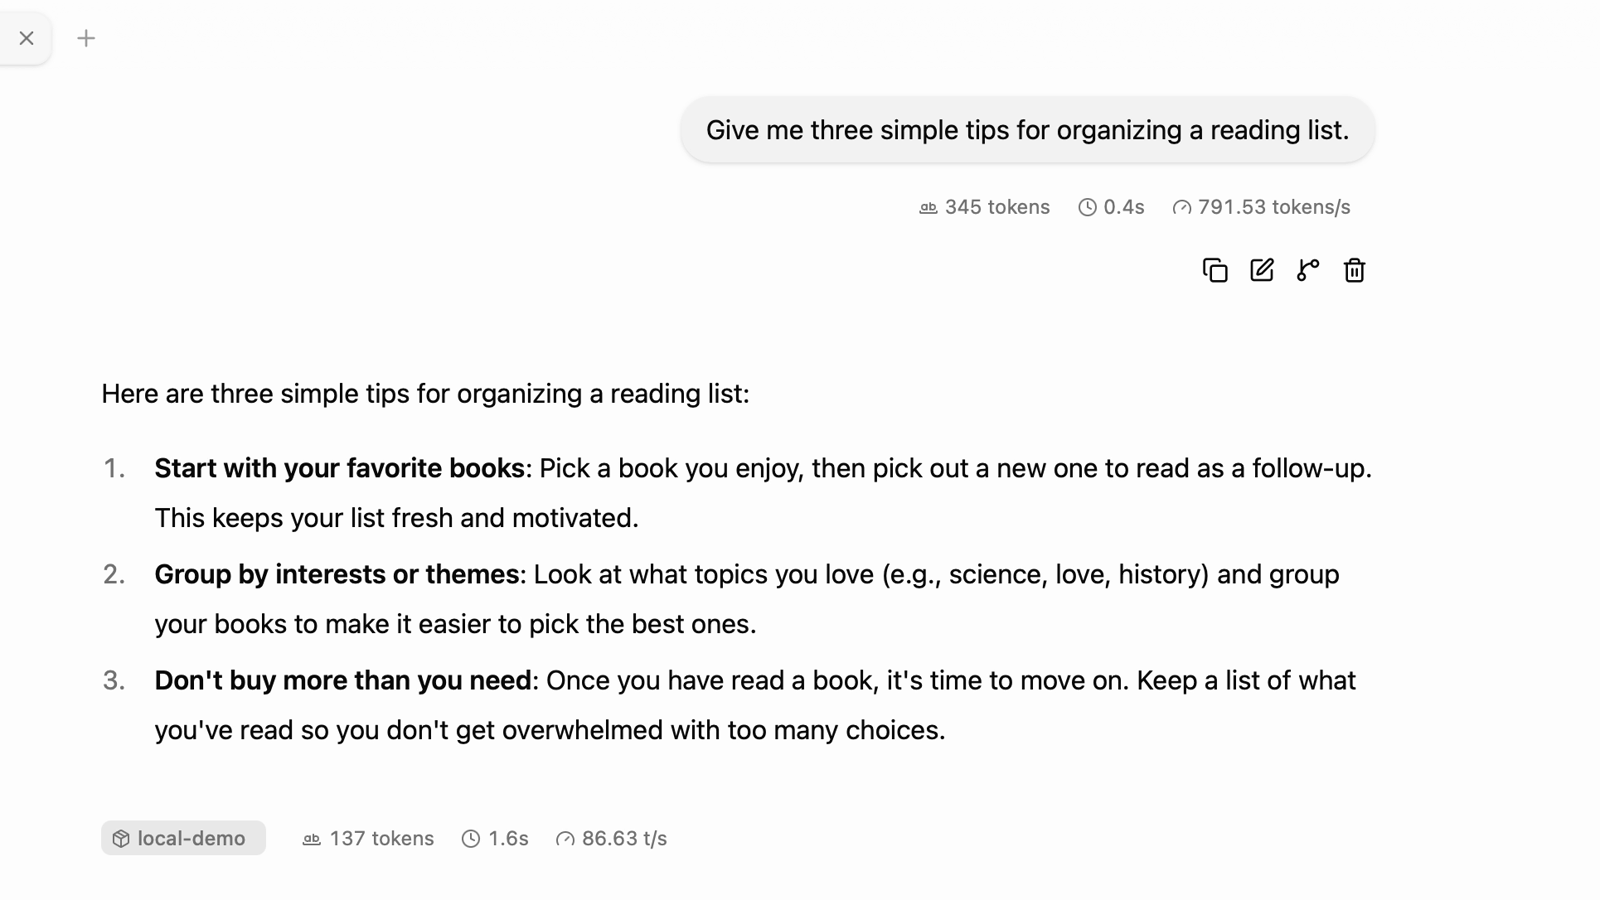
3. Chat in the browser
Leave the server terminal running and open http://127.0.0.1:8085. Enter a
short prompt and send it. The recorded browser session returned a response using the
local server. When finished, press Ctrl+C in the terminal to stop the server.
Connect a working runner to another application
An integration usually needs an address, model ID, and compatible API type. Some applications discover these automatically; others ask you to enter them.
| Runner | Server address in this guide | OpenAI-compatible base URL |
|---|---|---|
| Ollama | http://127.0.0.1:11434 |
http://127.0.0.1:11434/v1 |
| LM Studio, default port | http://localhost:1234 |
http://localhost:1234/v1 |
| llama.cpp, our example | http://127.0.0.1:8085 |
http://127.0.0.1:8085/v1 |
Follow the client’s field label: a server-address field and an API-base-URL field may expect different forms. Copy the exact model identifier reported by the runner. If you enabled server authentication, configure the client with the corresponding credential; a cloud API key is not inherently required for a local runner. Ollama documents its OpenAI-compatible endpoints.
Remember that localhost refers to the computer making the request. On a
phone, it normally refers to the phone. A paired application may route requests through
its host instead, so check where the integration actually runs.
Give the model enough context and memory
For agent workloads, context matters. Ollama’s OpenCode integration guide specifies 64k or higher. That uses substantially more memory than a short chat. On this 16 GB Mac, our 64k attempts timed out and the runner reported about 13 GB of model memory. The small recorded task succeeded with an explicitly configured 16k server, which reported about 5.1 GB and 100% GPU use. This limited test does not establish that 16k is sufficient for normal OpenCode workloads or larger projects.
To reproduce that small macOS/Linux test, first stop the existing Ollama app/service that owns port 11434, then start a terminal-managed server:
OLLAMA_CONTEXT_LENGTH=16384 OLLAMA_HOST=127.0.0.1:11434 ollama serve
In PowerShell, the equivalent environment settings are:
$env:OLLAMA_CONTEXT_LENGTH="16384"
$env:OLLAMA_HOST="127.0.0.1:11434"
ollama serve
Keep that terminal open. Run ollama ps in another terminal
while the model is loaded and check its CONTEXT,
SIZE, and PROCESSOR columns. The environment setting belongs
to this server process. An “address already in use” error means another service still
owns that port. Press Ctrl+C when finished.
We found that saving the app’s context slider did not change the context allocated for our external API request, even after restarting the app. Checking the actual running model caught the mismatch. Prefer a verified effective value over assuming a setting has applied. Ollama documents both the slider and the server environment variable in its context-length guide.
Troubleshoot one layer at a time
| What you see | What to check next |
|---|---|
| Command not found | Finish the runner’s installation, reopen your terminal, and verify its executable location. |
| Runner installed, no models | Download model weights. Installing software and downloading a model are separate steps. |
| Model downloaded, no response | Load the model, try a short prompt, and inspect the runner’s error or memory usage. |
| Very slow output or memory pressure | Stop other loaded models, reduce context, or try a smaller model/quantization. |
| Long reasoning with little visible answer | Check the exact model variant and its documented thinking controls. Try an instruct model for a basic smoke test. |
| Connection refused | Start the server and check the host and port. A saved profile does not start every runner automatically. |
| Model missing from another app | Refresh discovery and copy the exact model ID. A display name may differ from the API identifier. |
| Chat works but agent tools fail | Check tool support, prompt template, context, and the client’s integration. Chat success alone does not establish agent compatibility. |
| macOS reports a damaged app | Obtain a fresh official installer and check the vendor’s support guidance. Do not treat a failed launch as a successful setup. |
Privacy, storage, and everyday use
Local inference can keep model processing on your computer. It does not automatically make an entire application offline: model searches, downloads, updates, cloud-model choices, web tools, and external integrations can still use the network. LM Studio documents which operations work offline and which require connectivity. Use downloaded local models and review any tools you enable.
For use on one computer, keep servers on loopback addresses such as
127.0.0.1. Network sharing is a separate setup decision involving access
controls; it is unnecessary for these examples. Ollama’s
FAQ covers its local binding and model storage
conventions.
Unload a model when you want working memory back. Remove its downloaded files only when
you want disk space back. With Ollama, ollama rm qwen3:4b-instruct removes
that saved model; you would need to download it again to use it later. With LM Studio,
manage downloads through its model-management interface. With llama.cpp, keep track of
whether you used an explicit GGUF file or the runner’s download cache.
Once a small prompt works reliably, try one realistic task and evaluate the answer. Increase model size or context to solve a specific need, while keeping the working configuration available as a known starting point.
Optional: add your model in Lyre
Everything above works without Lyre. If you want to use your model for a project in Lyre, keep the runner running on the computer that hosts Lyre. For LM Studio, start its API server first. The following screenshots show the September 20 macOS walkthrough; model names and newer layouts may differ.
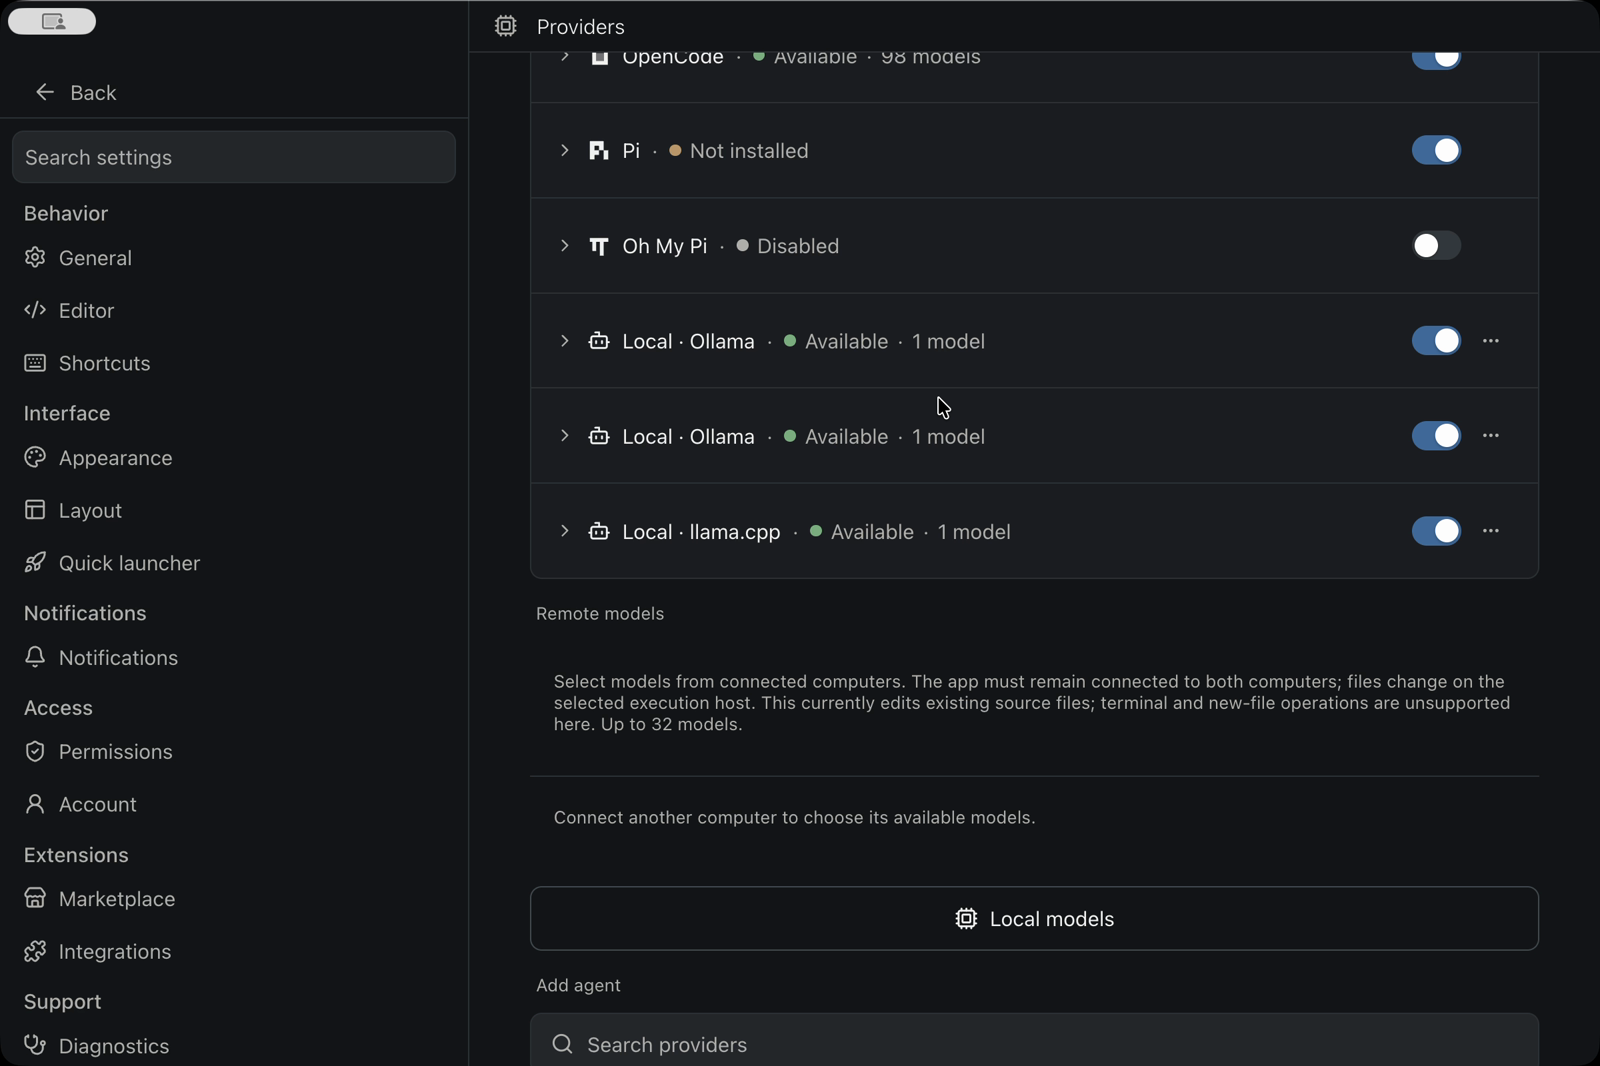
1. Open the local-model installer
Open Settings → Providers, scroll down, and choose Local models. The Setup guide inside that dialog walks through the runner, model download and connection. On supported hosts its checklist can offer an explicit Install action for a missing runner. Downloading model weights is a separate step.
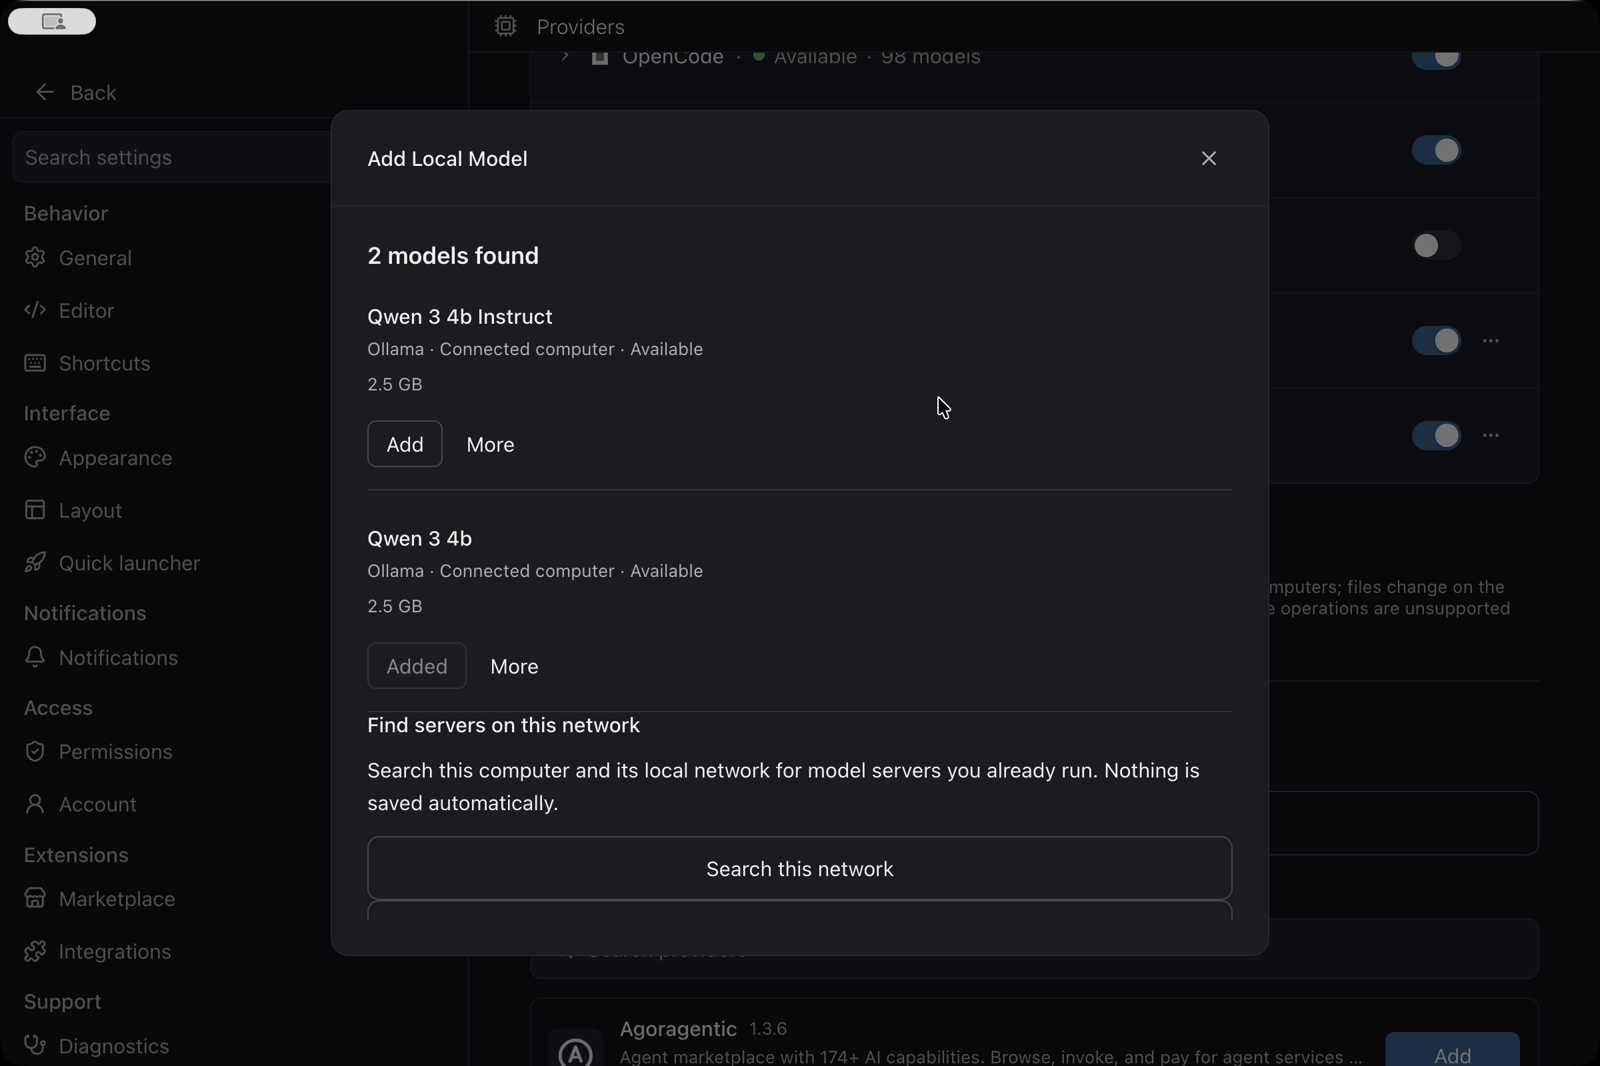
2. Add a discovered model
Choose Add Local Model. An empty collection starts discovery automatically. Click Add beside the model you want. If nothing appears, confirm the local server is running and refresh discovery.
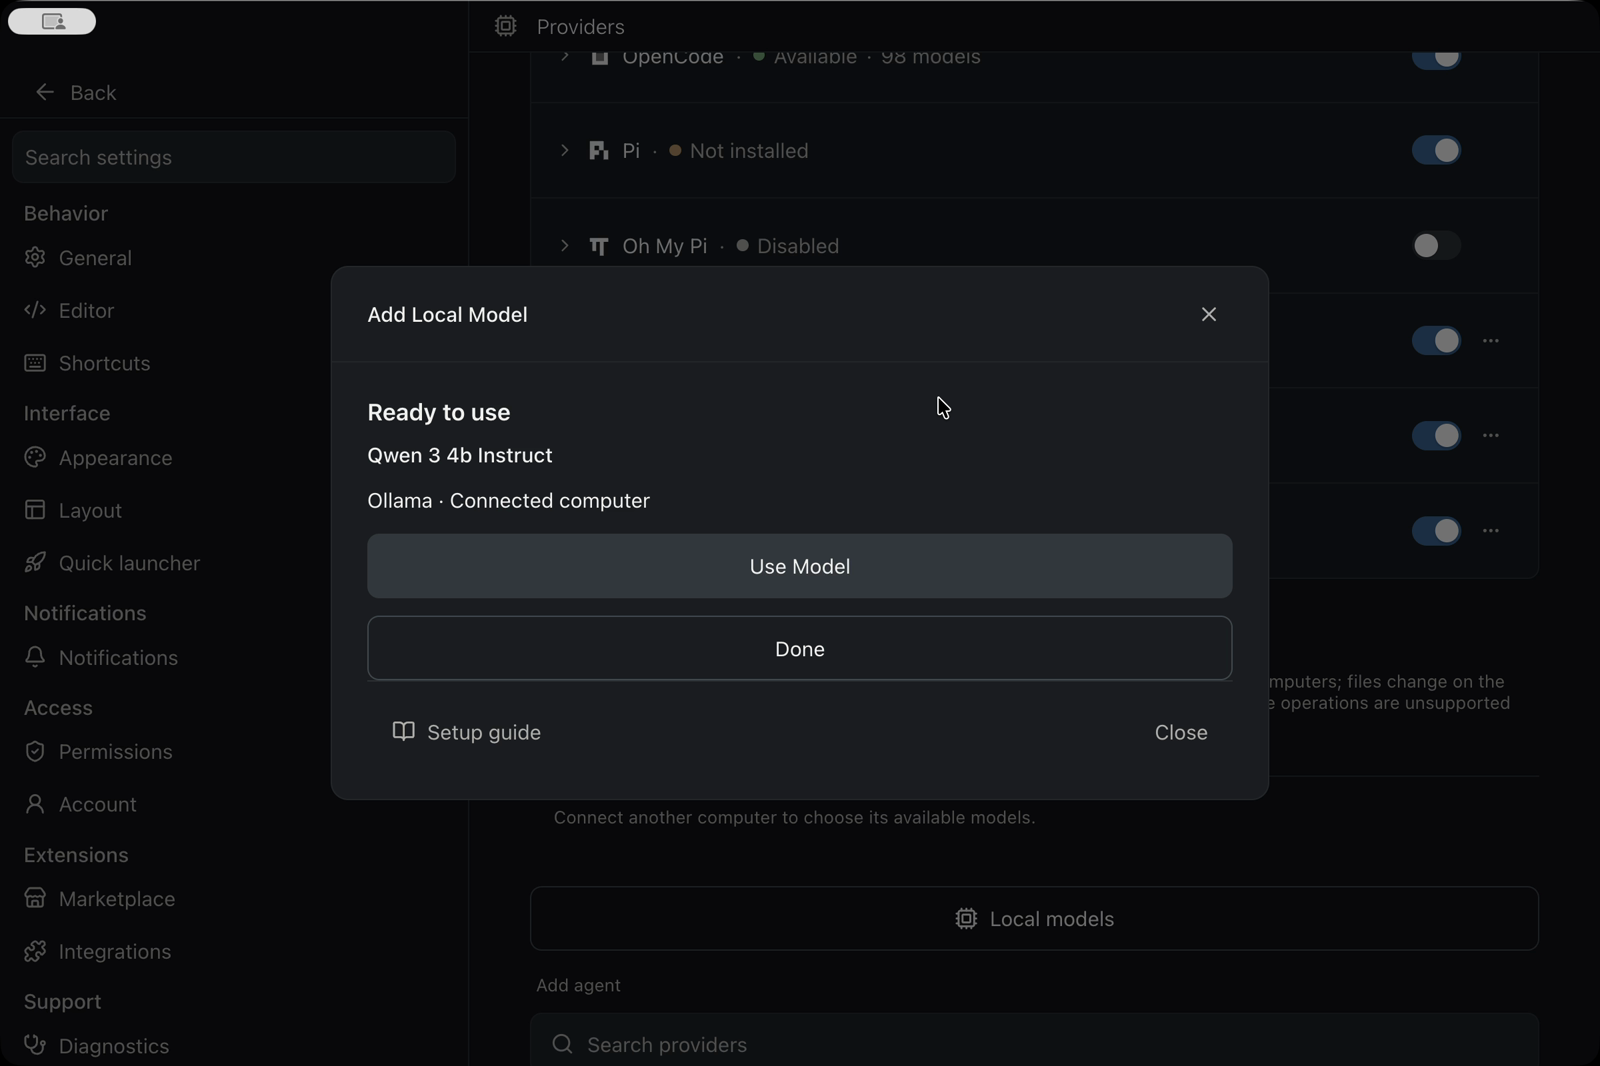
3. Select Use Model
Wait for Ready to use, then click Use Model to select the connection for a new conversation. Lyre’s local-agent workflow uses OpenCode; complete its provider installation if prompted. Discovery and Add save the connection, so this route does not require hand-editing an OpenCode configuration file.
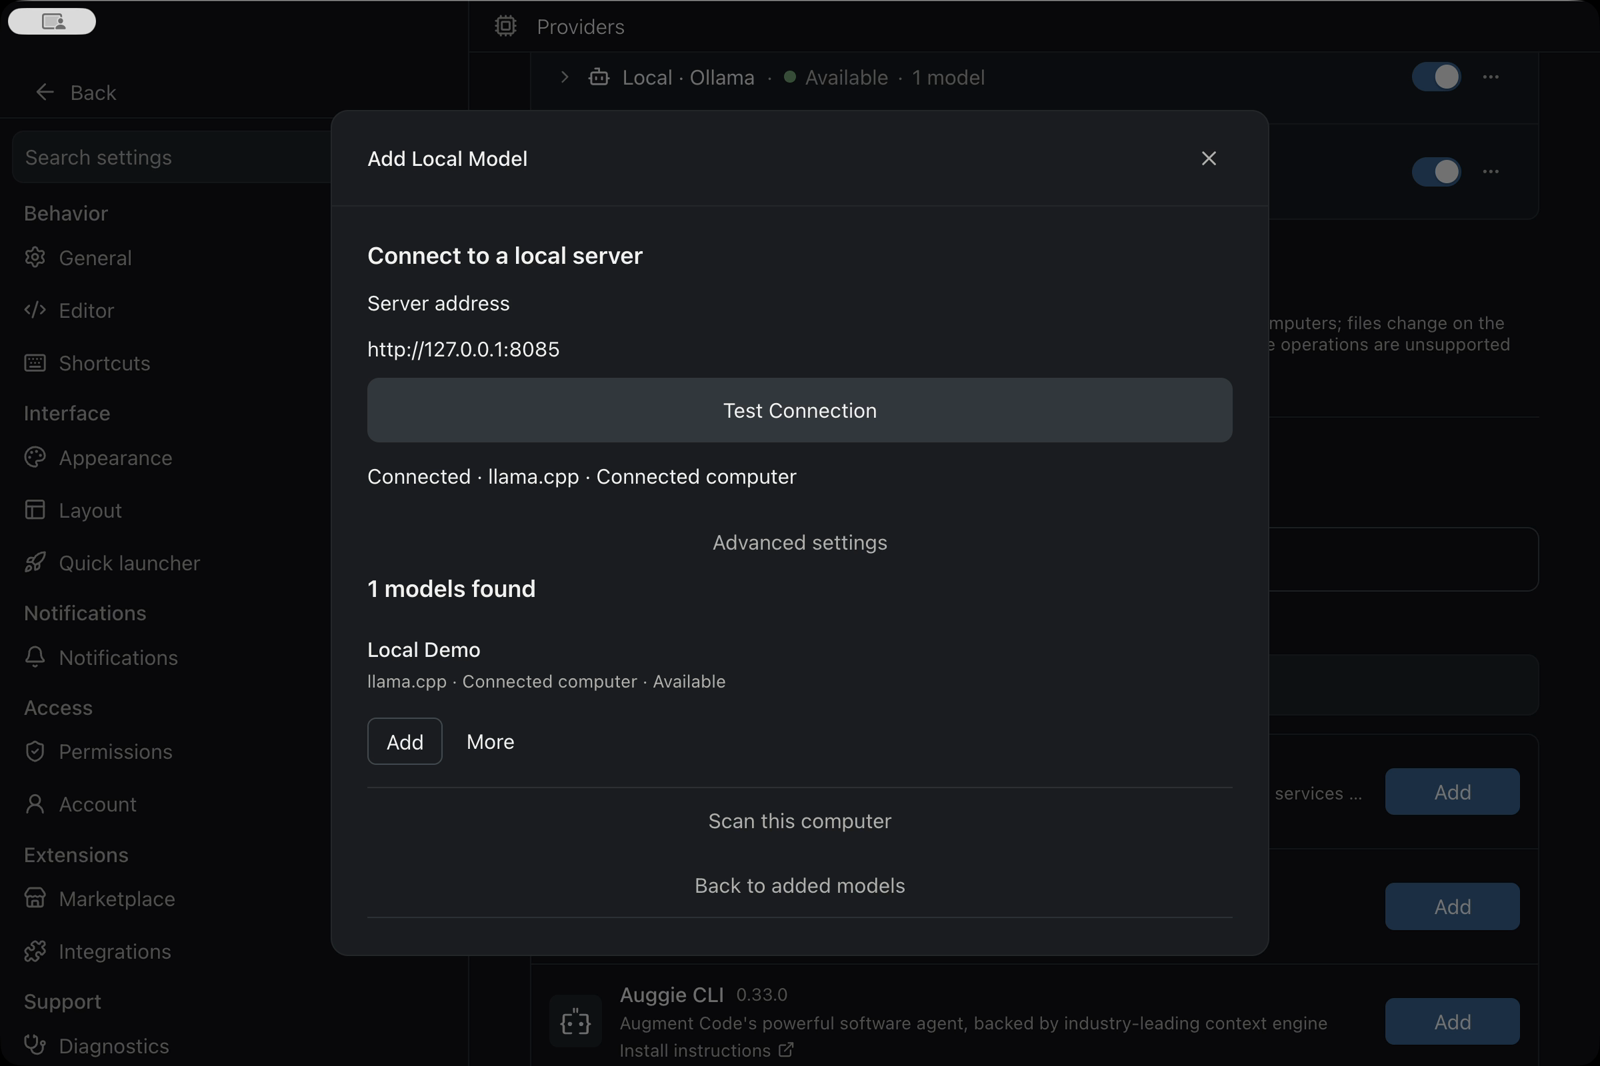
4. Use Connect manually for a custom server
In Add Local Model, choose Connect manually. Enter the
server address, click Test Connection, and wait for
Connected. For this llama.cpp example, enter
http://127.0.0.1:8085. Click Add beside
local-demo, then Use Model. Use your actual port if you
changed it.
5. Verify one small task
Start a new agent in a test project. Confirm the selected model, then ask: “Read README.md and summarize it. Do not change files or run commands.” Check the answer before requesting edits.
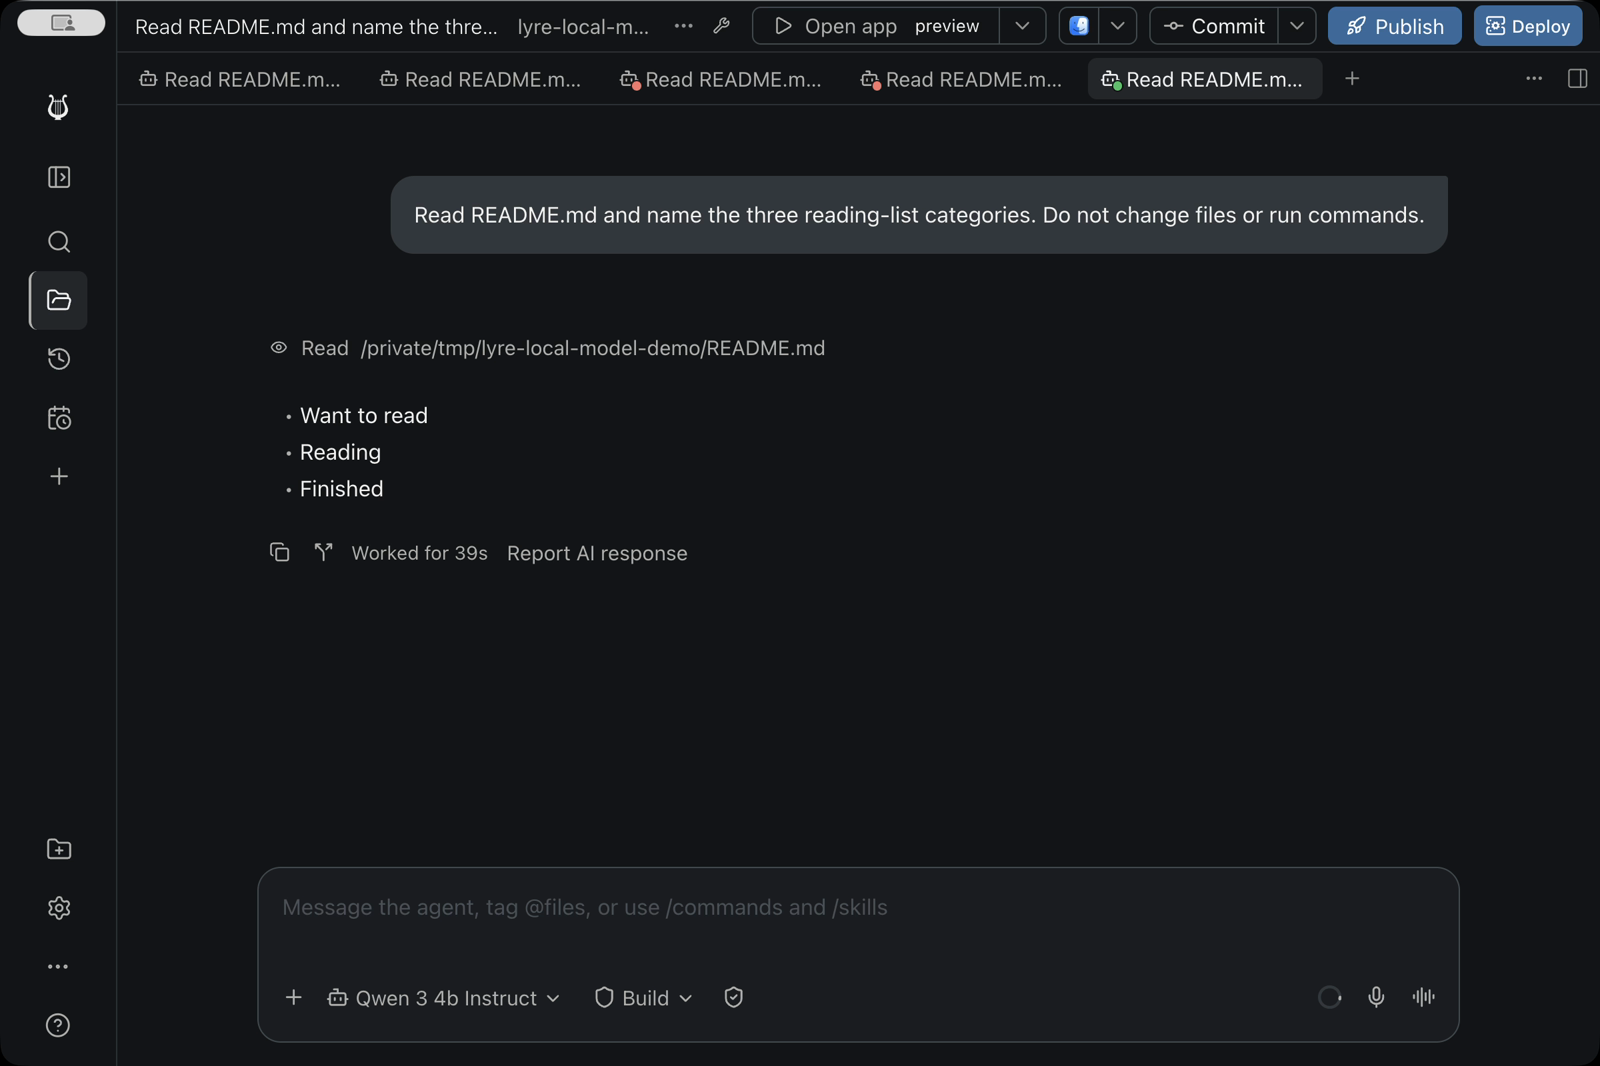
Lyre saves the connection and selection; the external runner owns the model files. Removing an entry from Lyre does not free its disk space. Discovery runs on the connected host, so localhost means that host rather than your phone. On an older host without model management, the setup guide retains an advanced OpenCode configuration example; replace its model-ID placeholder and merge with your existing settings.